The Buddy System: Gym Edition

Why Work Out With a Friend?

So, why should you grab your spouse, significant other, friend, sibling, acquaintance (or anyone for that matter) and bring them to the gym with you? There are actually a few reasons. Making plans with someone holds you accountable, so you’ll be less likely to blow off a workout. Additionally, working out with someone allows you to take advantage of exercises that you wouldn’t be able to do on your own, plus partner stretches can really push muscles to the limit and help your muscles to be long, lean and injury-free! Also, working out with someone you enjoy spending time with is FUN! As if I really needed to say the last reason. Grab your partner and get sweatin!  Below are a few of my favorite partner workouts, plus a partner stretch, to keep you and your buddy active, strong and toned. Your workout just got a lot more fun!

Workout #1: Pass The Medicine Ball (abs, obliques, arms)

Lay on your back, in “crunch” position, facing your partner, with your feet in one straight line (all four of them!). One partner holds the medicine ball overhead (typically a 6 lb. ball should work well for this exercise, but this may vary) and both partners lift at the same time and twist toward one another. Pass the ball to the other partner and return to start position, with the medicine ball in the second partner’s hands. Now repeat so that the ball gets passed back in the same way, back to the first partner. Do 3 sets of 10-15 reps and then switch sides (so you’re twisting to the other side).

position A

position A

position B

position B

position C

position C

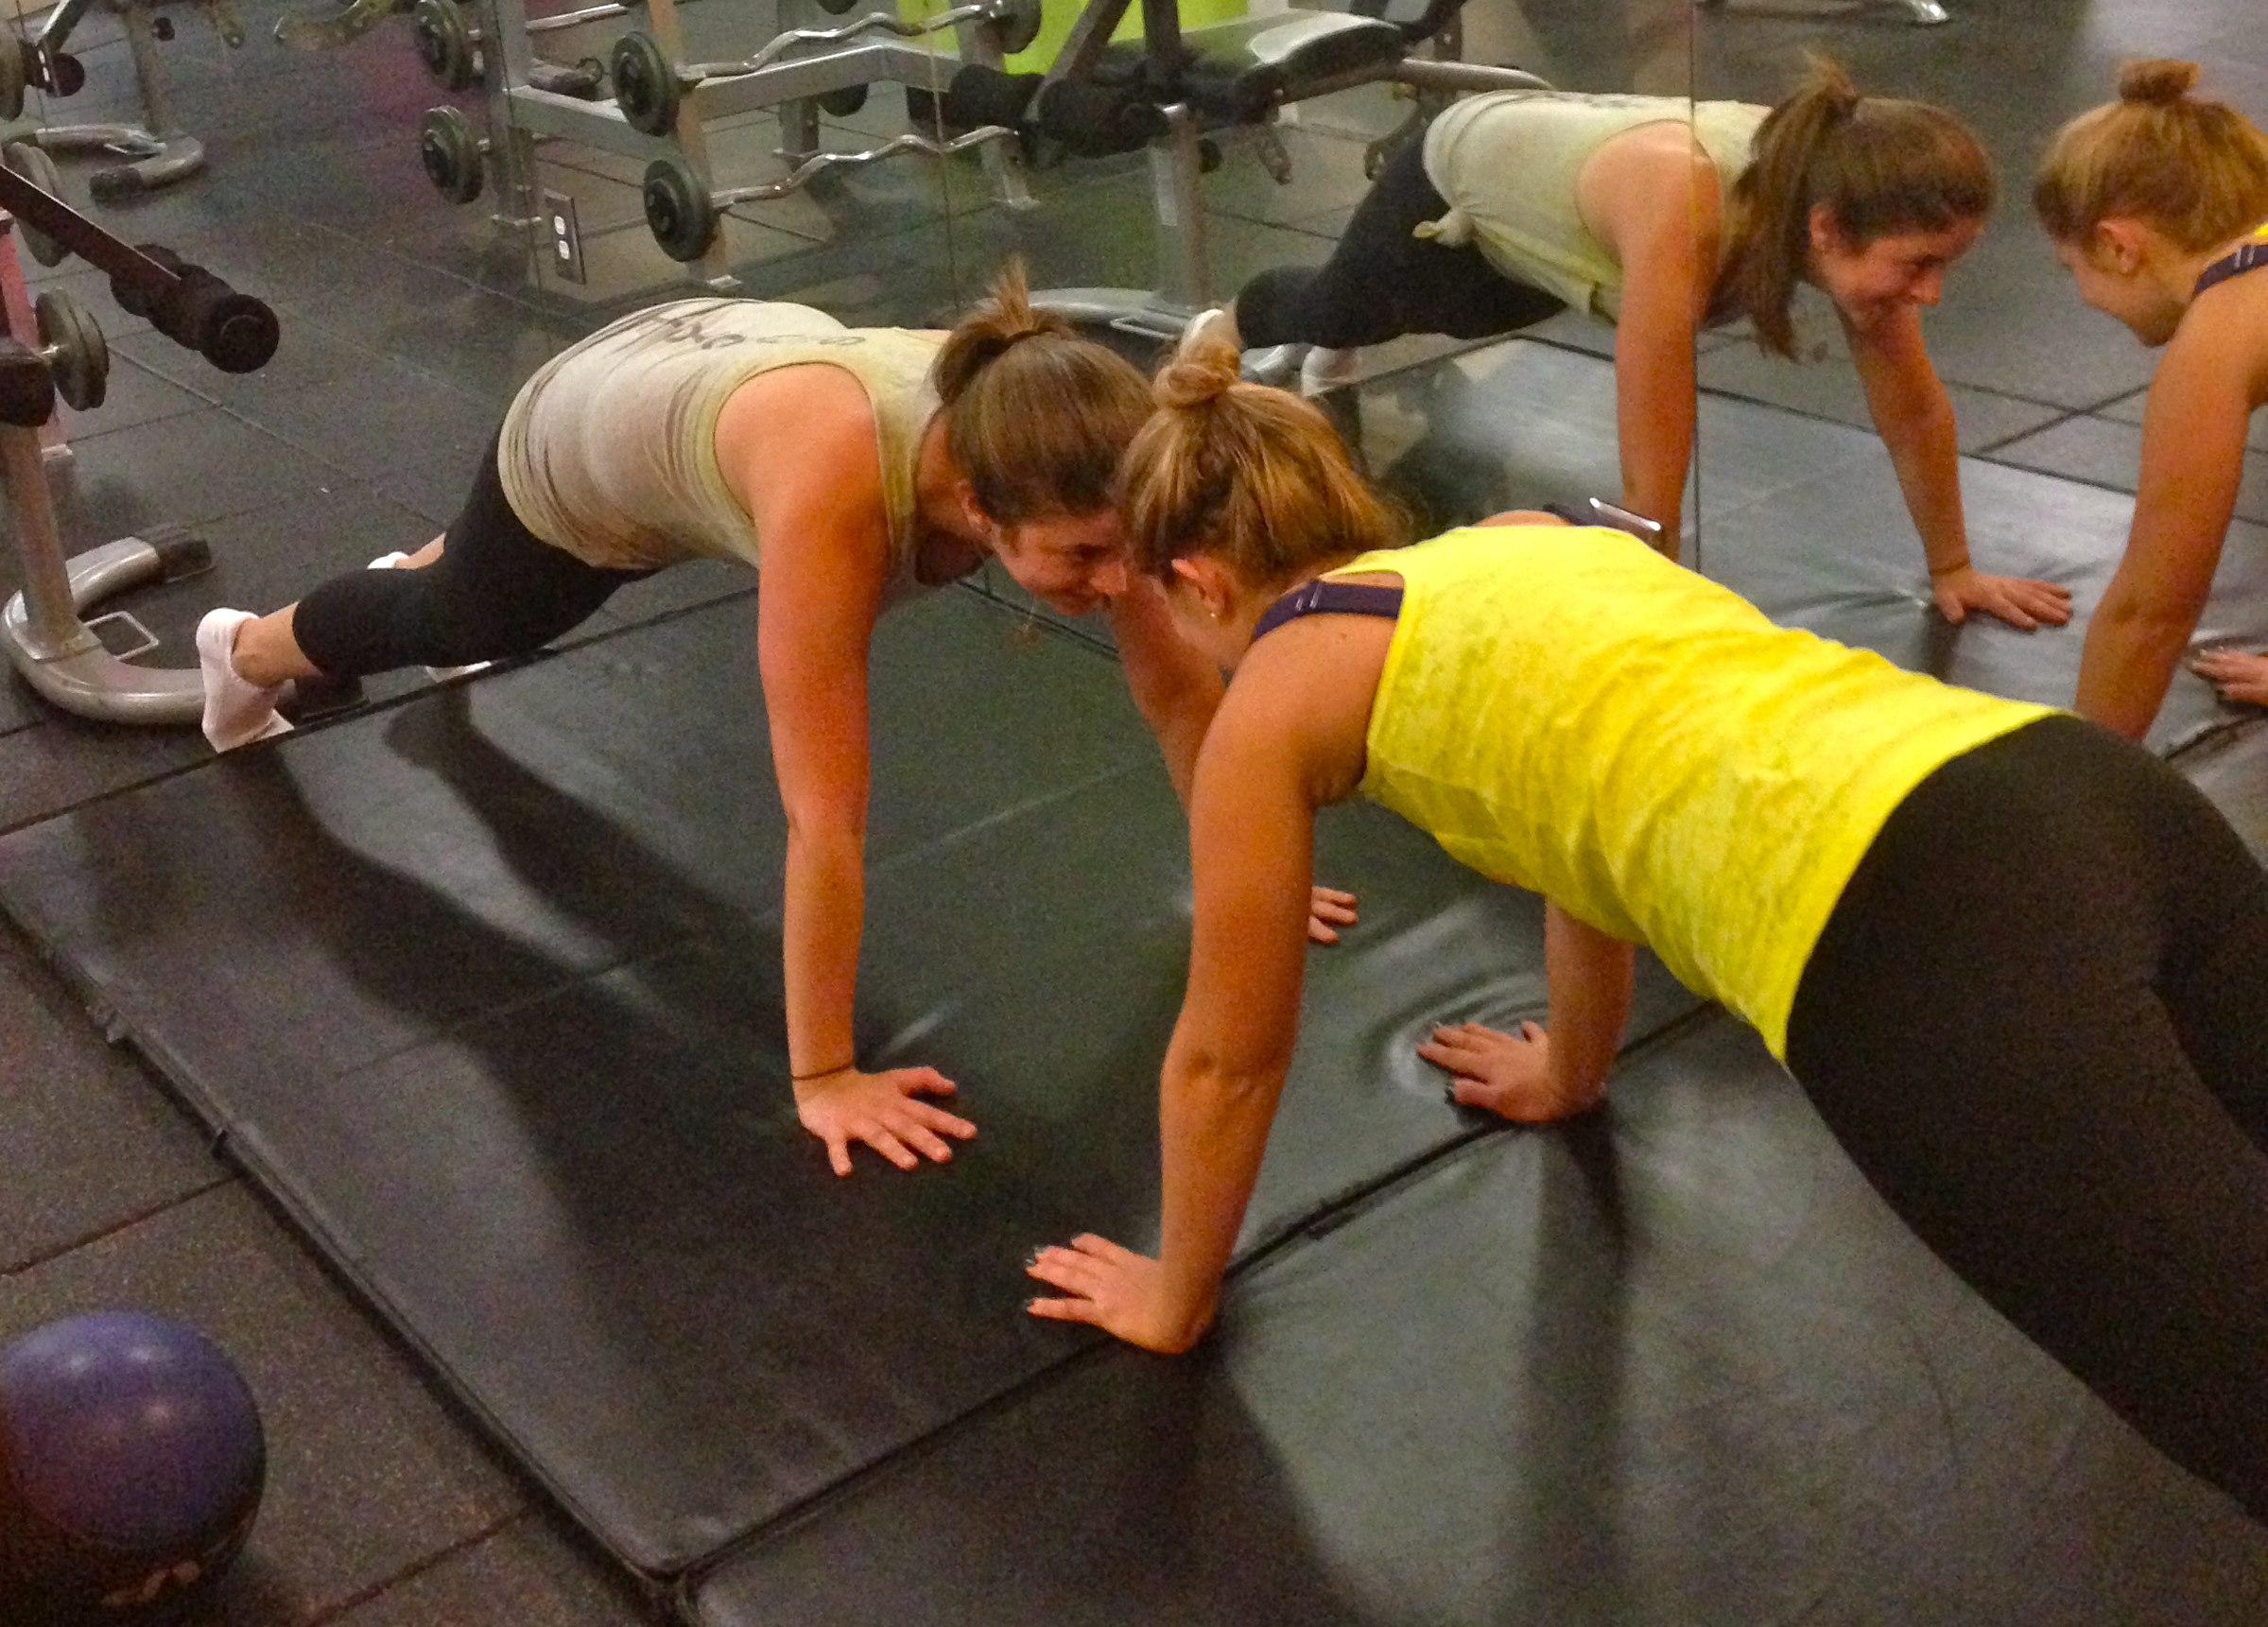
Workout #2: High-Five for Push Ups (arms, core, glutes)

Get into your yoga plank position (back straight, elbow joint direction under shoulder joint), facing your partner. At the same time, both you and your partner will shift your weight into your left arm/hand and lift your right hand off the floor, slap each other’s hand, and place your hand back down. Repeat, this time shifting your weight into your right arm/hand and lifting your left arm. Both hands lift for 1 rep. Perform 3 sets of 10-20 reps, depending on how advanced you and your partner are.

position A

position A

position B

position B

position C (really just the start position - same as position A!)

position C (really just the start position – same as position A!)

position D

position D

position E (really just the same as positions A and C - sensing a pattern?)

position E (really just the same as positions A and C – sensing a pattern?)

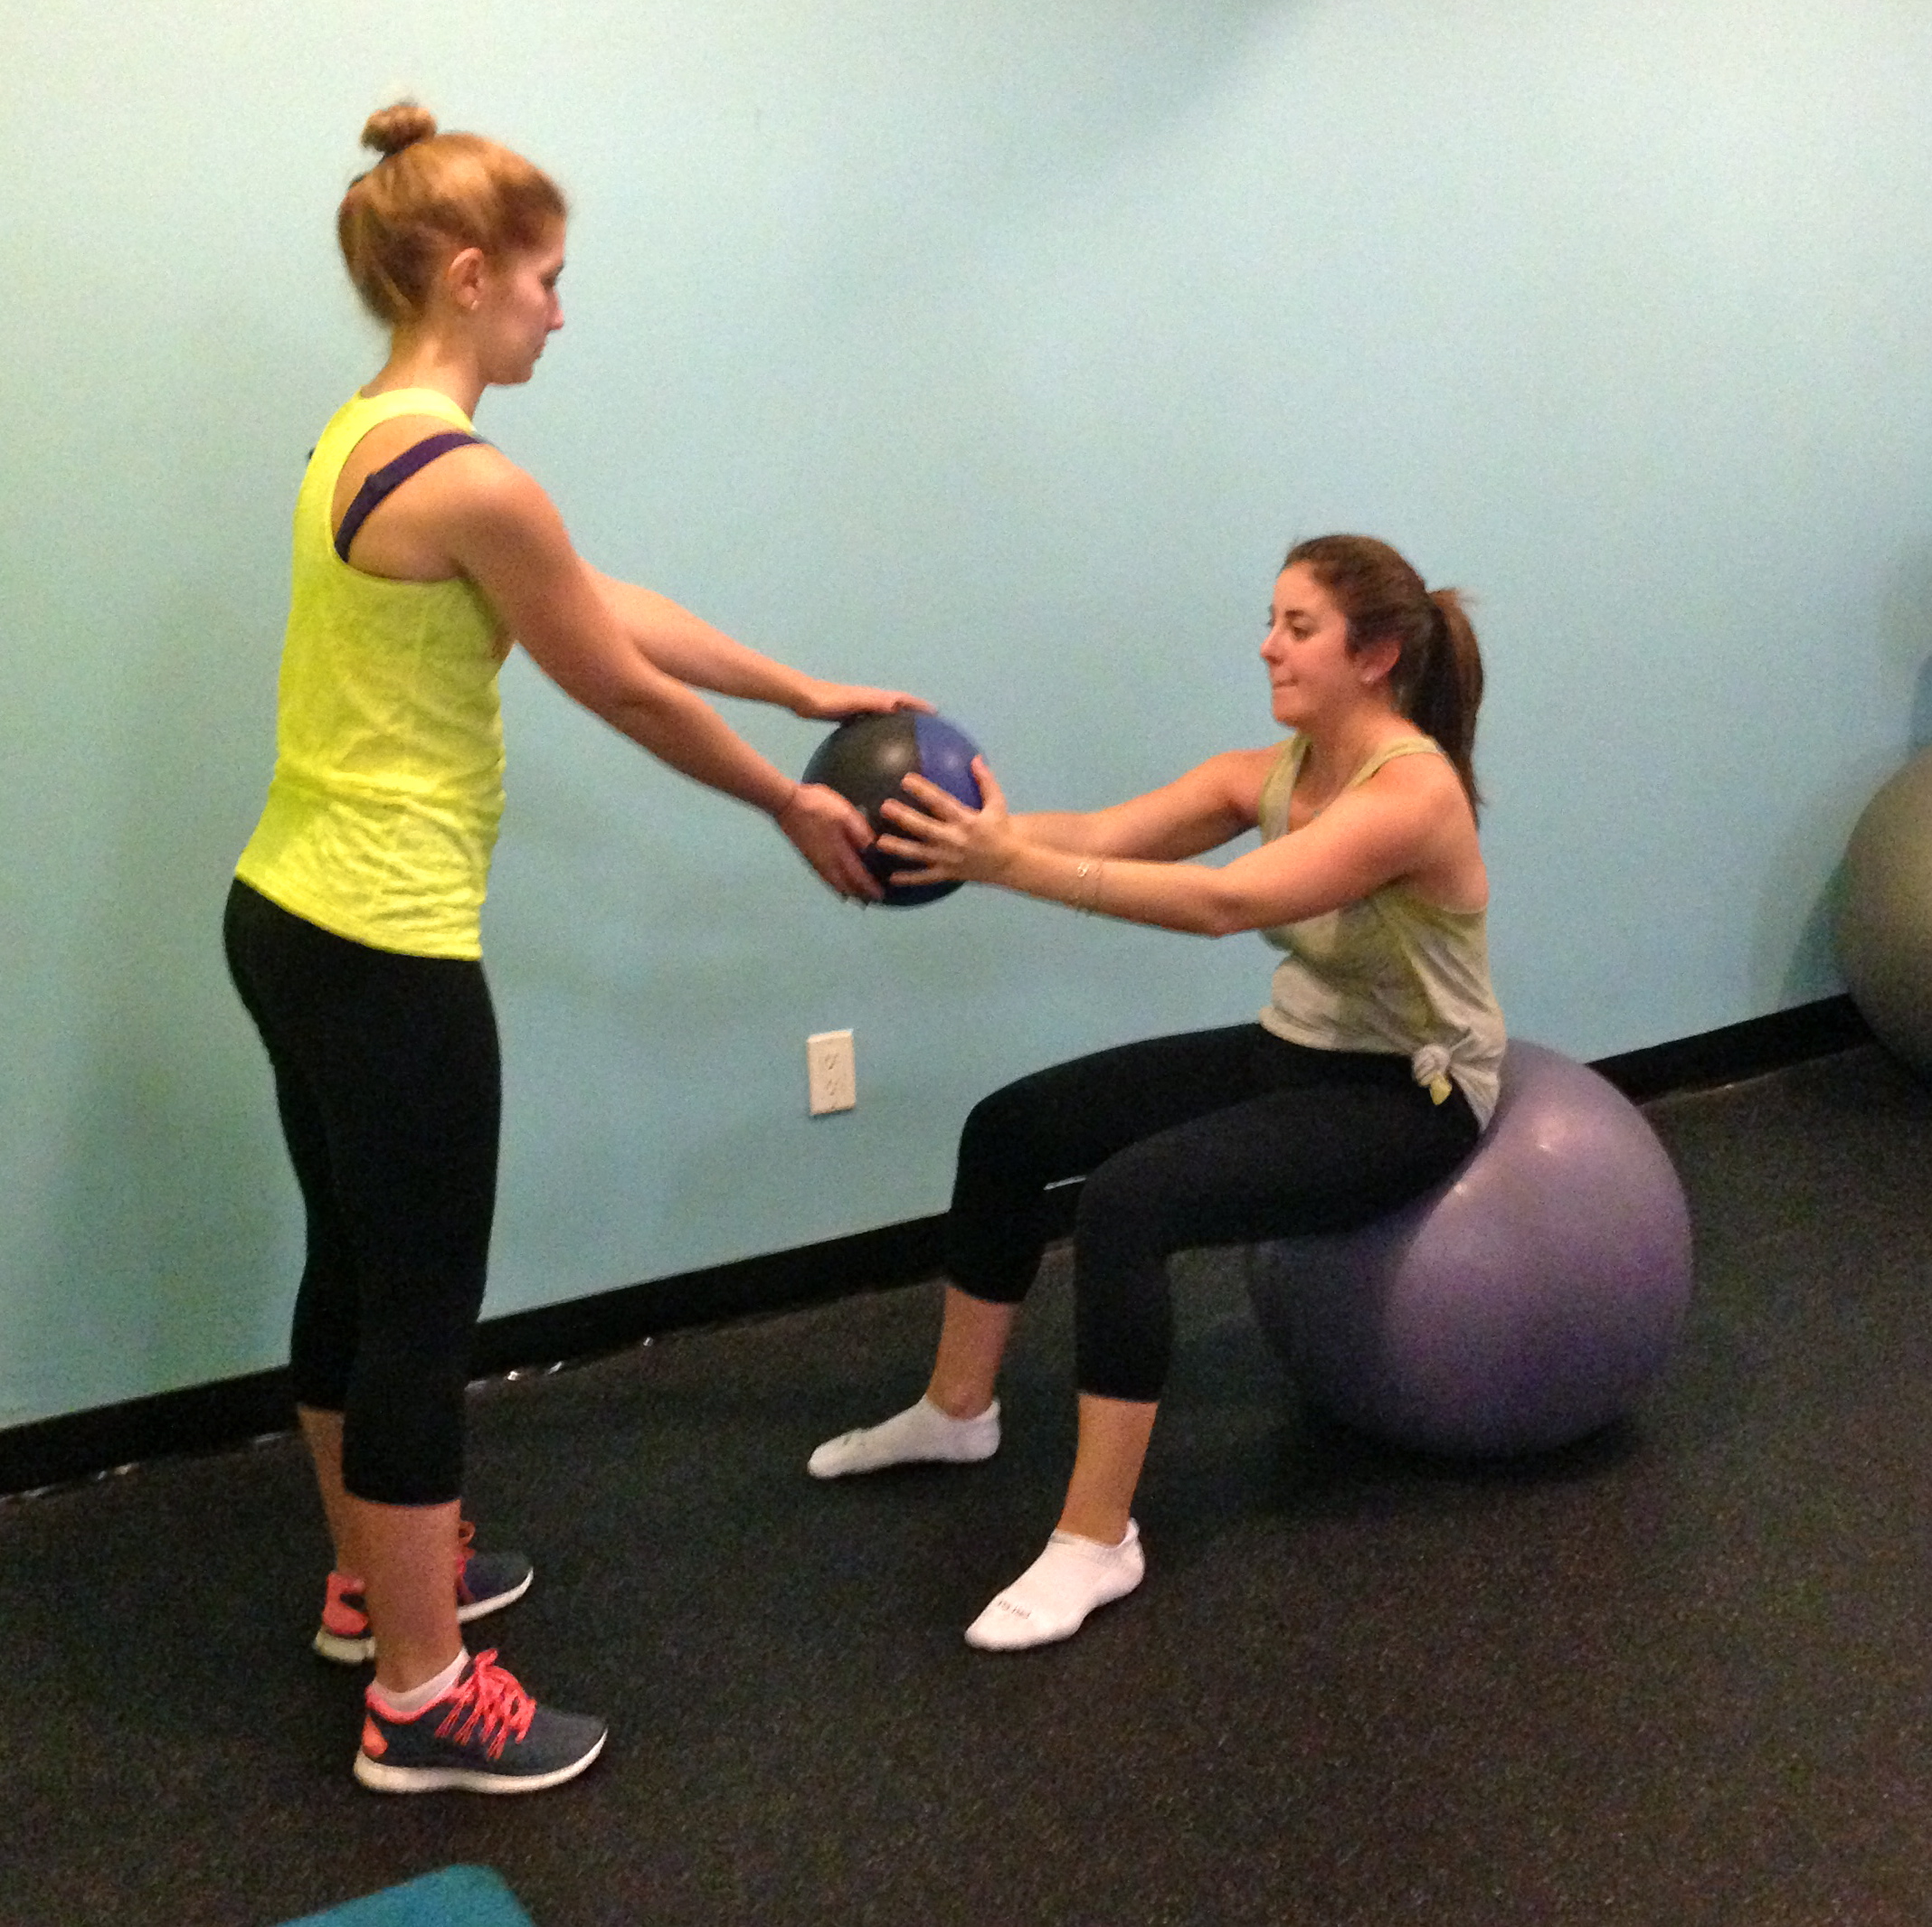
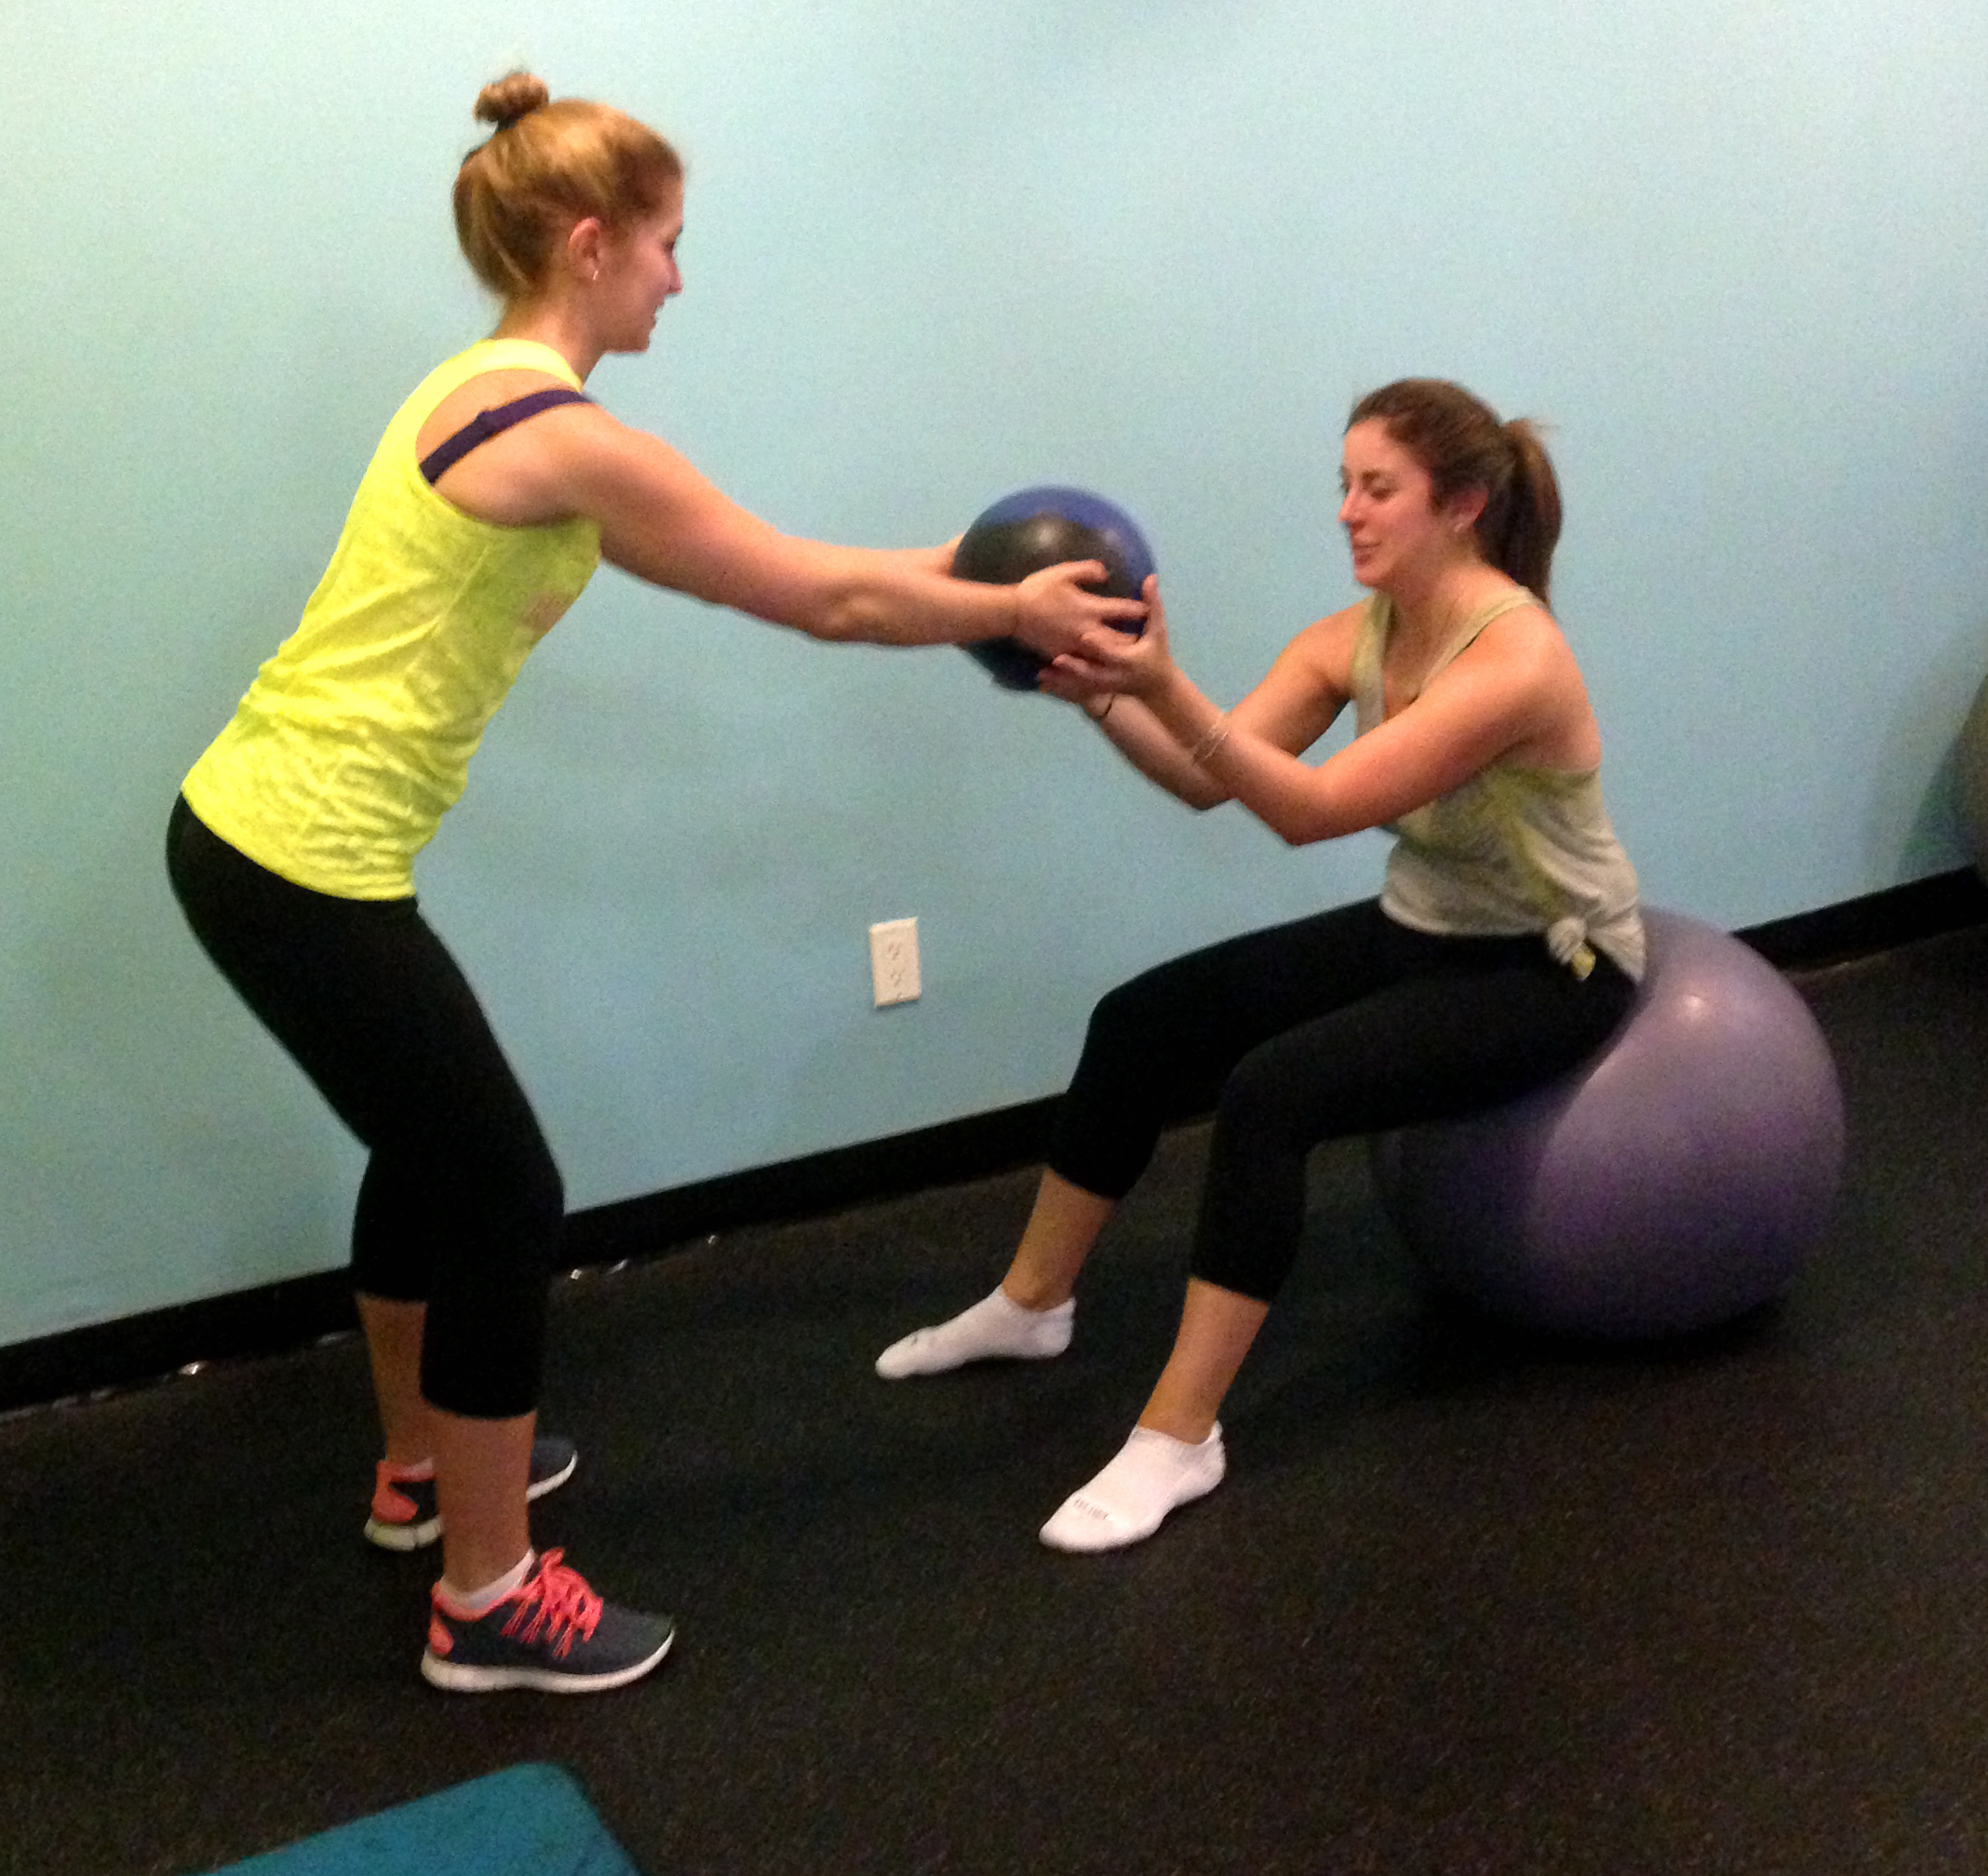
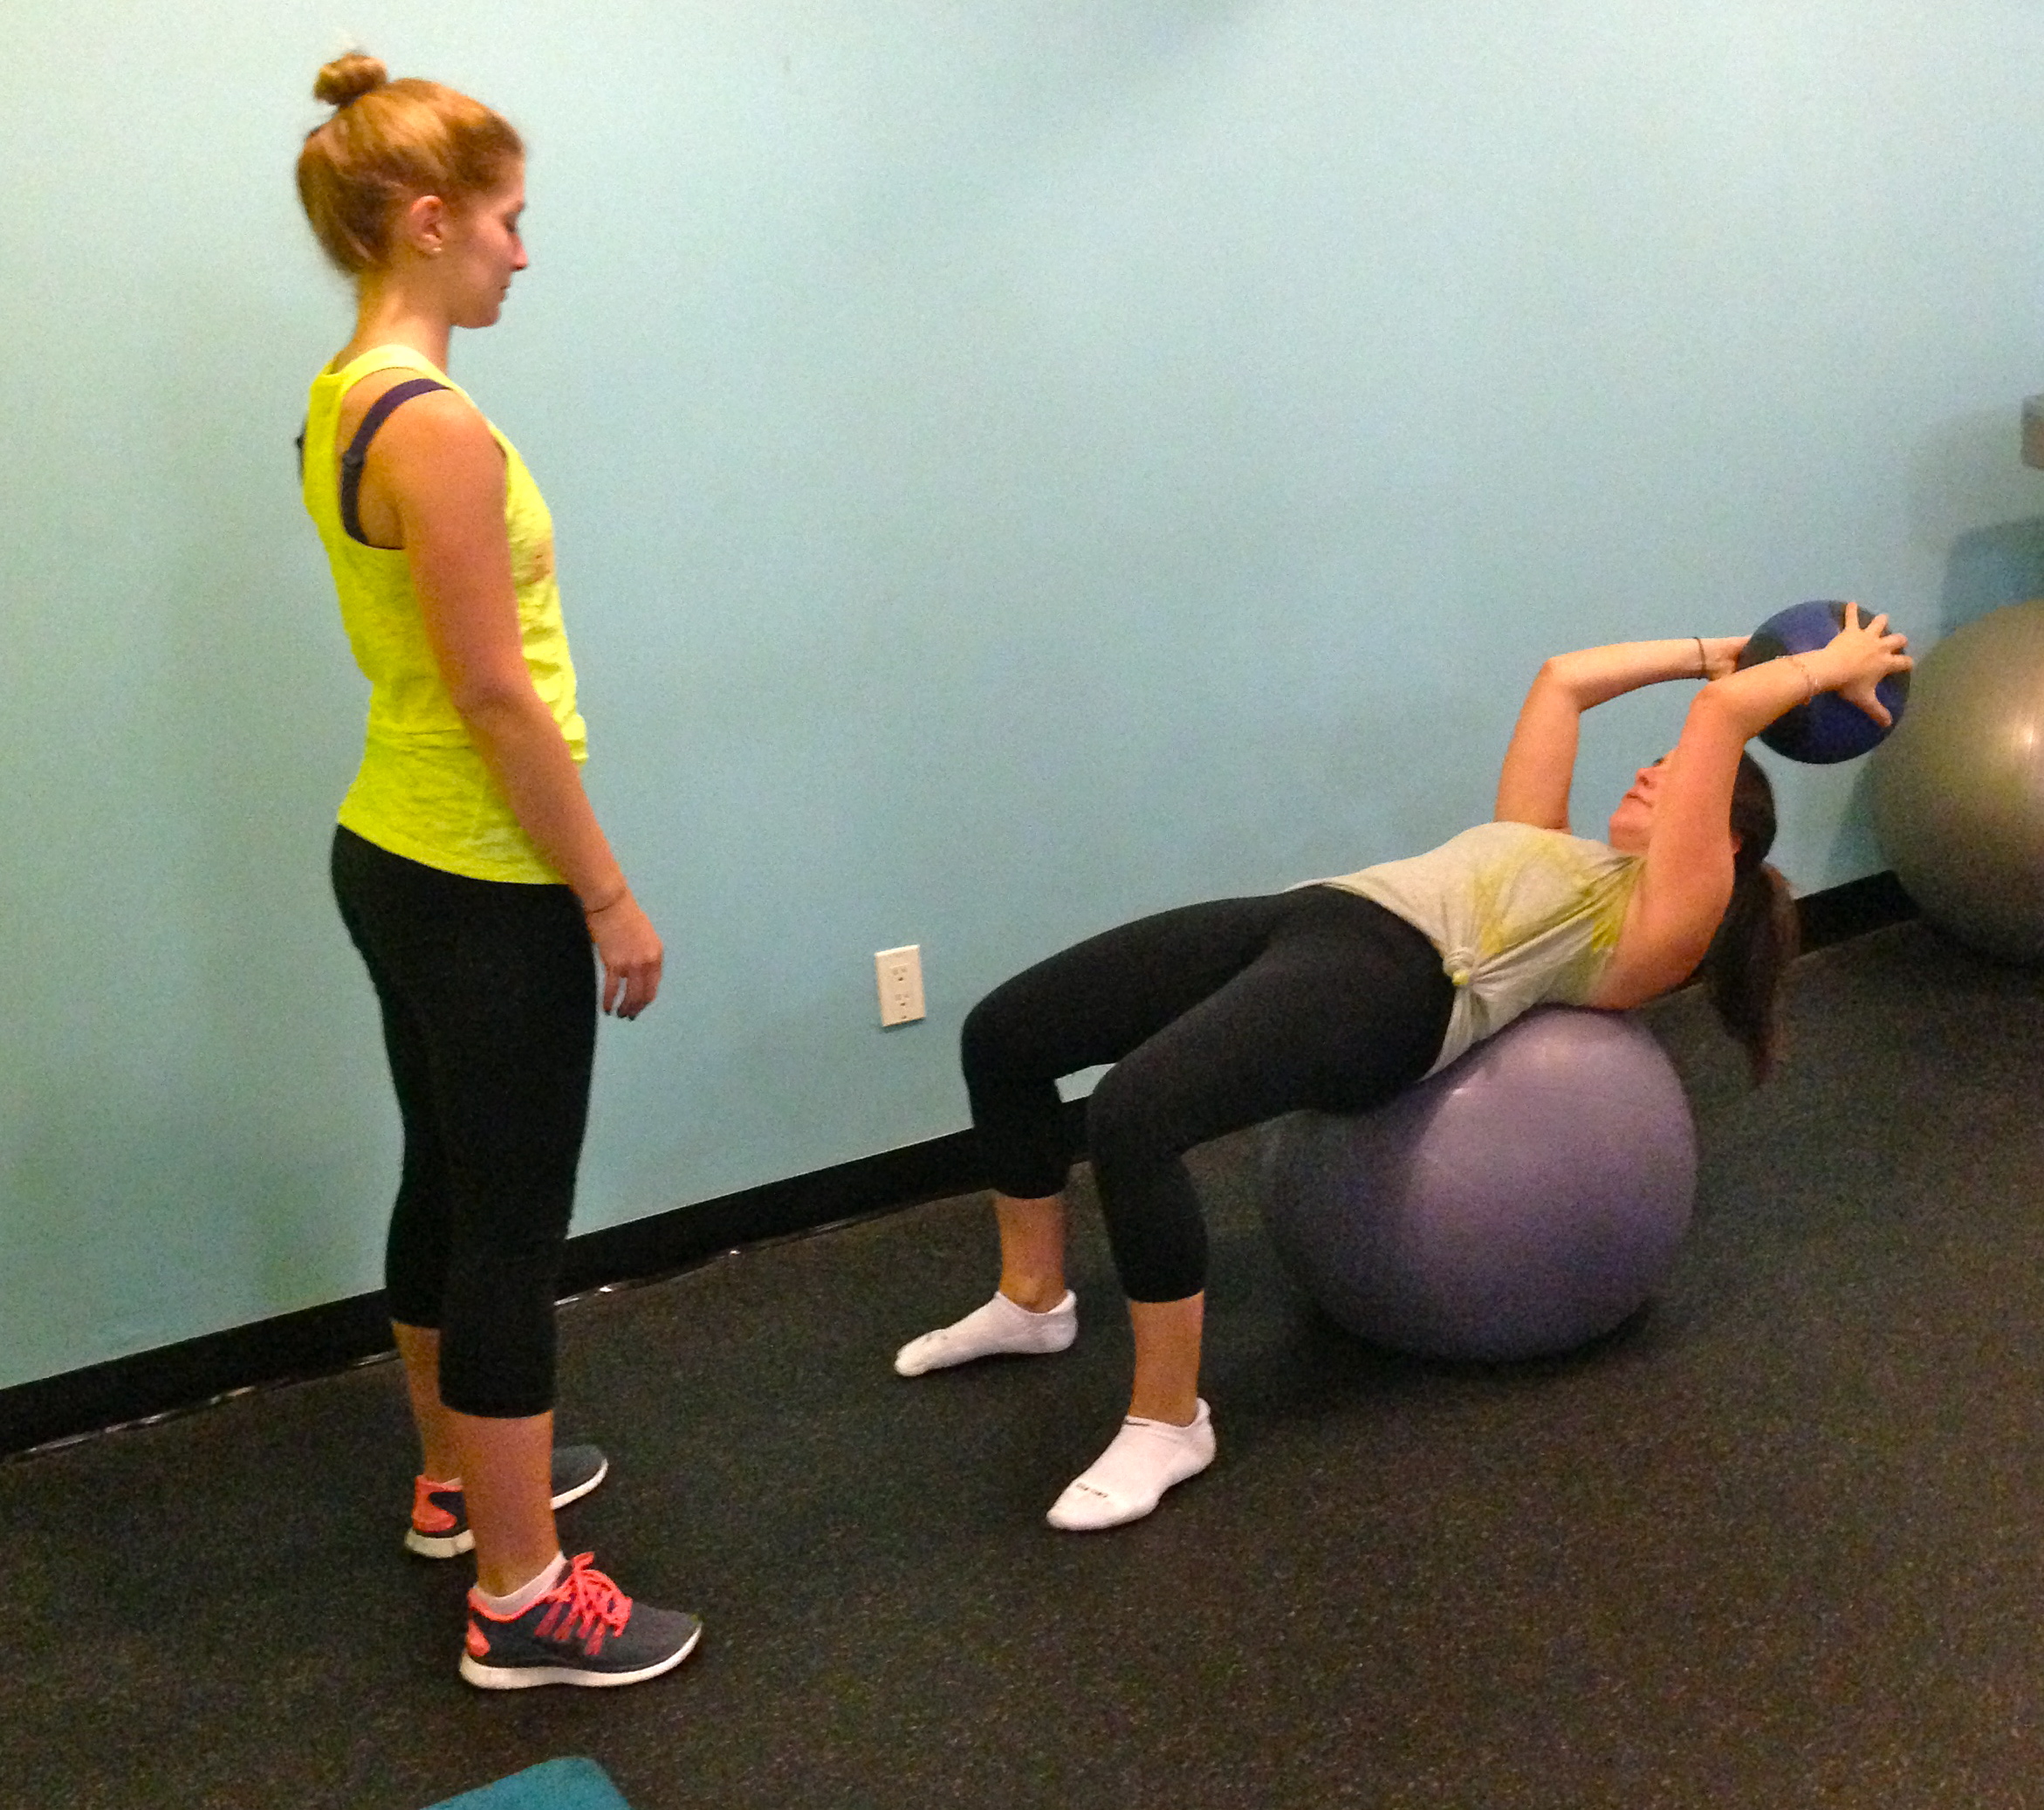
Workout #3:Crunch and Squat (abs, arms, glutes, legs)

For this exercise, one partner will lay on a resistance ball with feet firmly planted on the floor, holding a 4-6 lb. medicine ball overhead. The resistance ball should be in contact with your lower – mid back. The second partner should stand a couple feet apart, with feed about hip-width apart and knees soft. The “crunch” partner will crunch up, pass the medicine ball to the “squat” partner, who will then take the medicine ball and squat before coming back up and passing the ball back to the “crunch” partner. Then, the “crunch” partner will return to the start position. That counts as 1 rep. Perform 3 sets of 12-15 reps.

position A

position A

position B

position B

position C

position C

position D (really the same as position B)

position D (really the same as position B)

position E (really the same as position A)

position E (really the same as position A)

Workout #4: Medicine Ball Toss (glutes, legs, core, arms)

This one is really fun and reminds me of playing catch when I was younger. Stand a couple feet away from your partner, with feet about hip width apart. Both partners will squat, while only one partner will hold a medicine ball (4,6 or 8 lb. should work for most). While remaining in a squat the entire time, gently underhand toss the ball to your partner and have your partner pass the ball back to you. Continue this for 1-3 minutes, lowering your squat every 30 seconds (since your legs will stretch and you will be able to go lower as time goes on). More advanced? perform more than one set, or add on another minute!

postion A

postion A

position B

position B

position C

position C

Partner Stretch

This stretch is really great for tight hamstrings. Lay on your back in with legs bent and feet on the ground. Raise one leg and have your partner gently push your foot closer toward your head. Hold for 10 counts and then have your partner gently push slightly further. Hold for another 10 counts. Repeat on opposite legs, then switch and help your partner stretch.
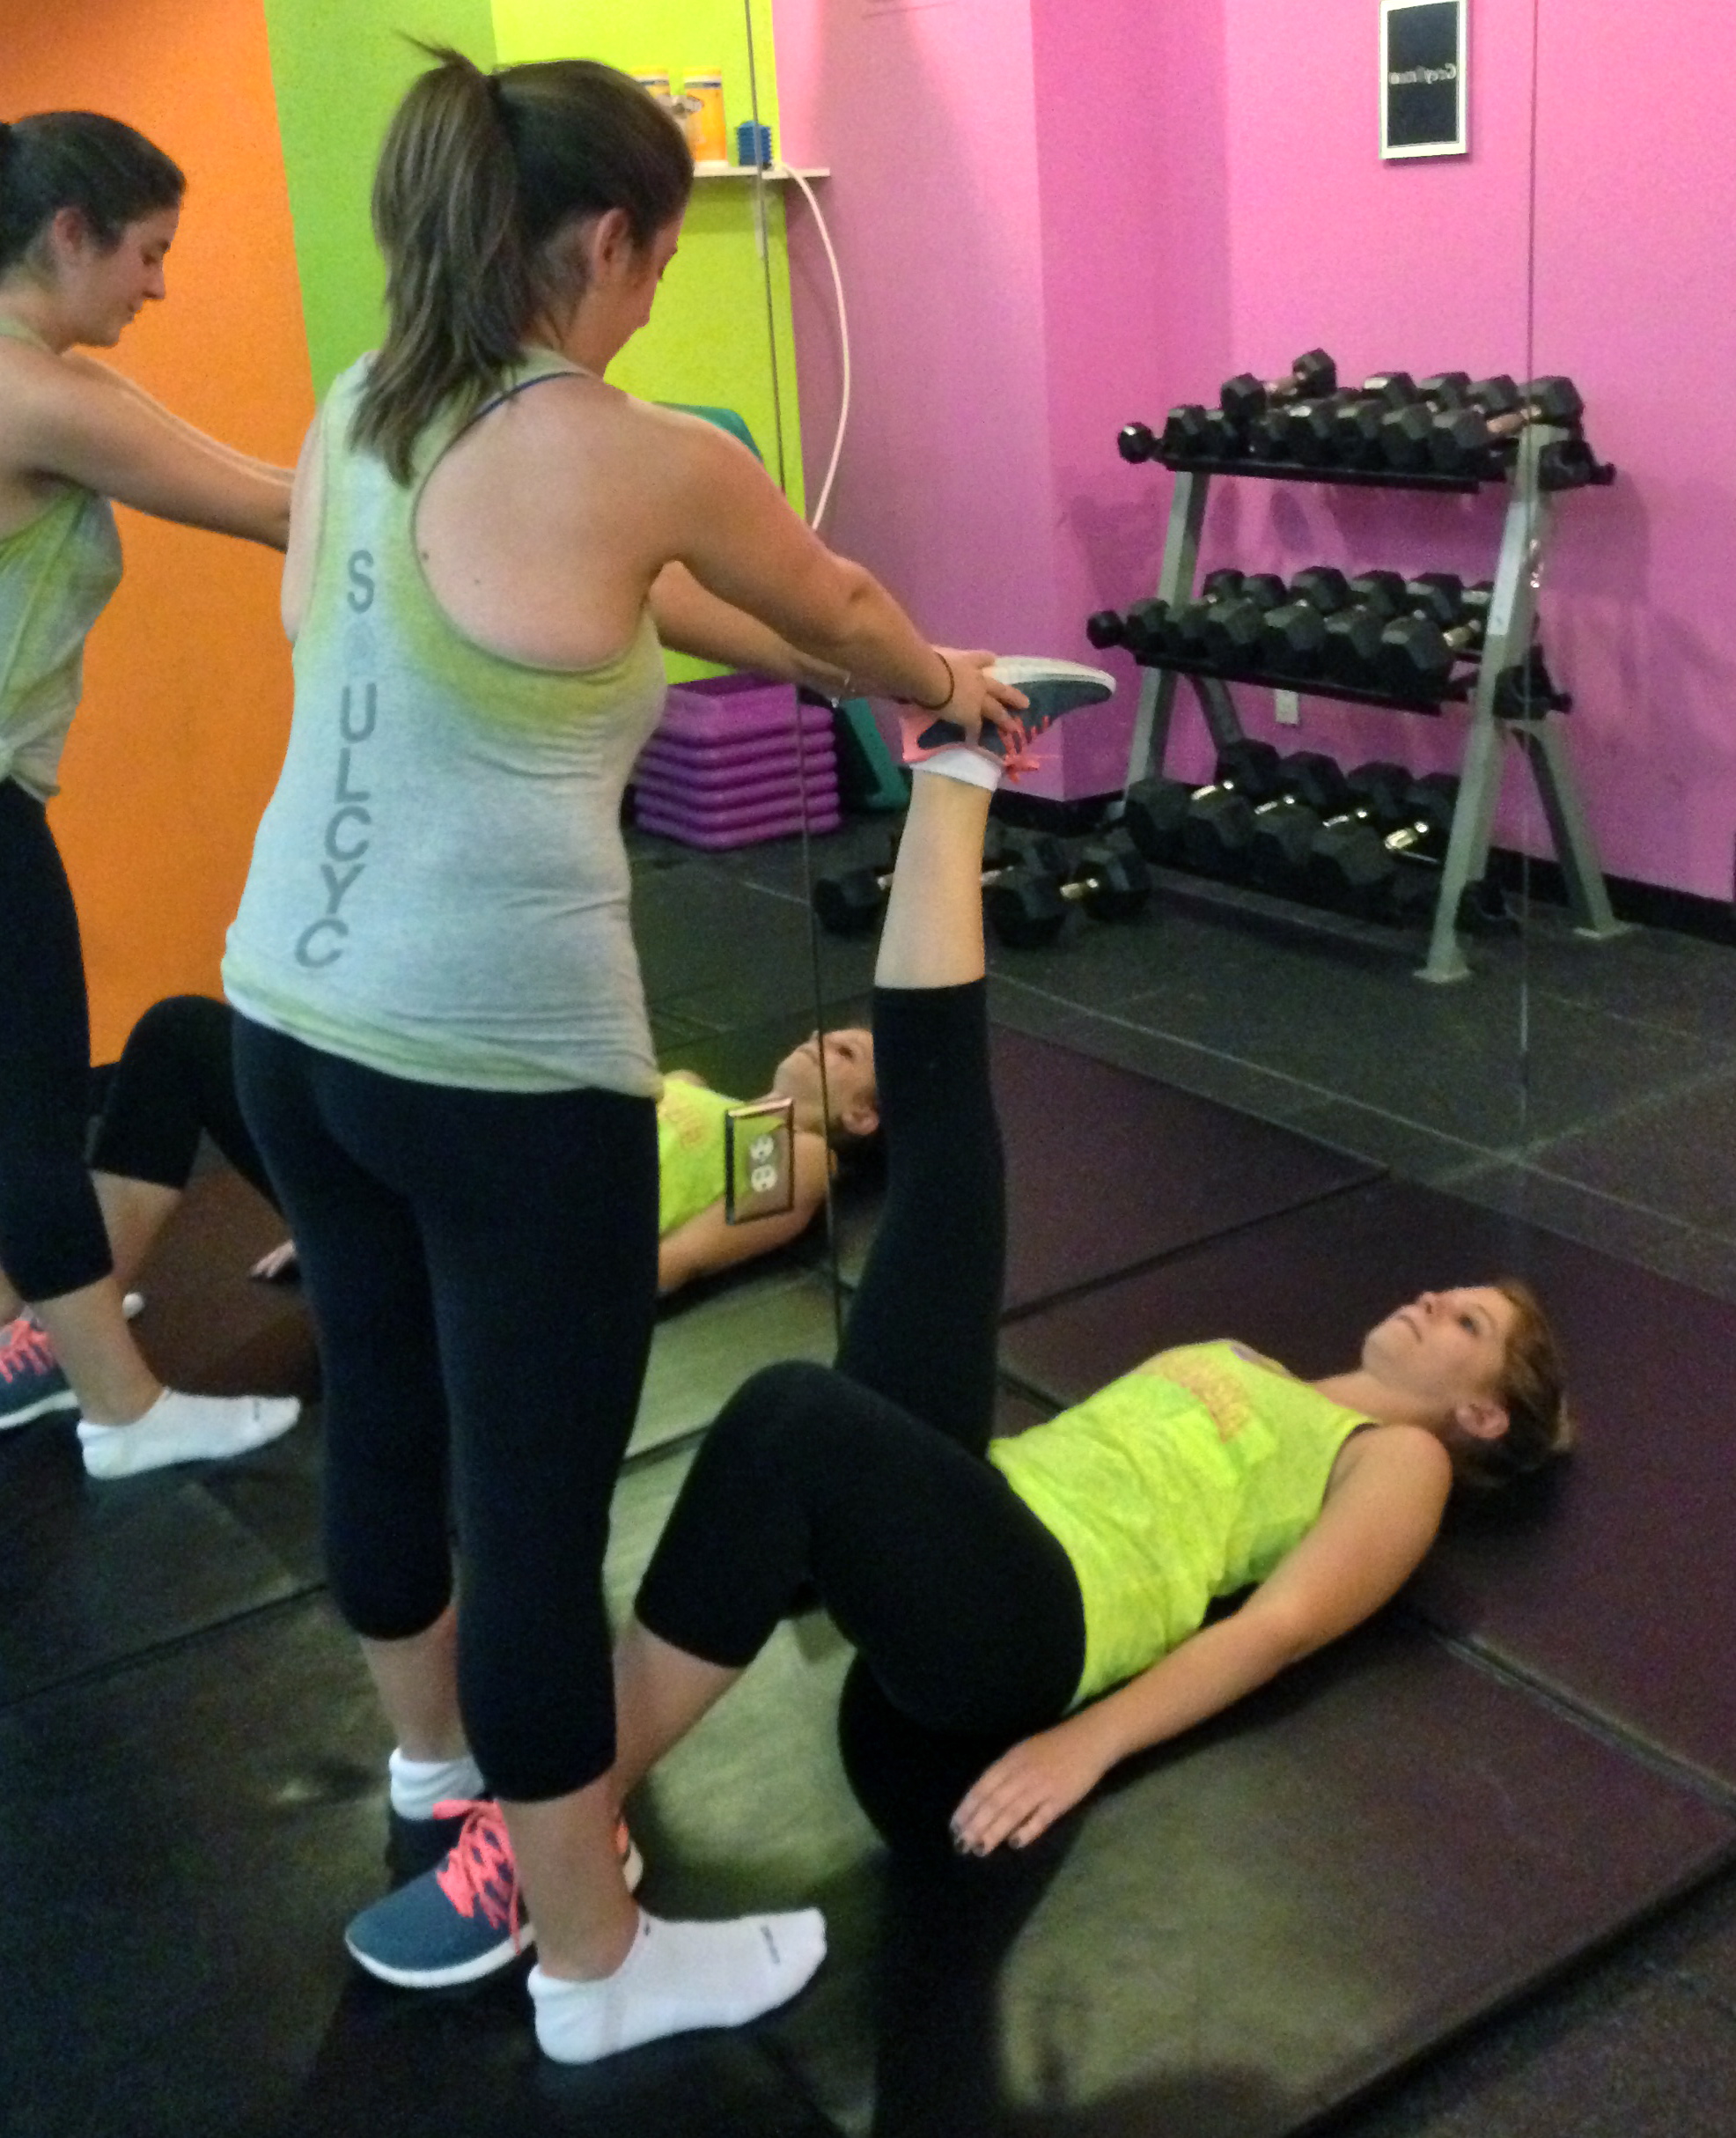
time to stretch!

time to stretch!

*Prior to beginning any fitness regimen, please consult your physician and make sure that you are fit to engage in such activity. If you feel unfit to perform this or any other recommended exercise, or feel faint, ill, injured or uneasy while performing an exercise, stop immediately and seek medical attention. 

**Special thanks to my friends, Casey and Ruthie, for demonstrating these moves! 


Advertisement

Back to Basics: 5 Simple Workouts You Know So Well You’ve Forgotten – and How to Incorporate Them Into Your Routine!

Why go back to basics?

These five simple workout moves target the major muscle groups so that you can get strong and toned. They’re basic because they work and many people seem to have forgotten how to do these basic moves or just don’t bother to do them anymore. No equipment, no time, no problem! These moves require no or minimal equipment and take minimal time, but offer maximum results. Below are the moves, so you can make sure you’re performing them correctly. While it is best to combine these moves with a cardio session, these are excellent, efficient moves that you can perform when you were going to take the day off in a matter of minutes.

Break it down:

the squat

While there are many variations of the squat, the basic squat is a simple, fuss-free move that delivers great results for your core, glutes and thighs – all of the trouble zones! Begin by planting feet on the floor (standing up) with feet approximately hip width apart. Knees should be soft throughout the entire workout (so no hyperextension of the knee – even in the “up” position!) This greatly reduces the risk of injury and keeps muscles activated. Inhale as you lower your body down, while keeping you feet still. Stay in the “down” position for 1 count and return to start position, exhaling as you come up and keeping knees soft. That was 1 rep. Depending on your fitness level, you may want to start out doing 3 sets of 12. If you are a more advanced exerciser, try 3 sets of 20, 25 or 30.

position A

position A

position B

position B

the lunge

This move is a great multi-tasker. Grab some weights (or you can perform this without the weights, or fill up two water bottles for some added weight if you do not have equipment). Stand with one foot in front of you and one foot in back of you, with the back heel lifted off the floor. This heel should remain off the floor for the entire exercise. Hold 5-15 lb. weights in each hand and bend elbows at a 90 degree angle (approximately). As you lower, bend your front knee and lower your back knee toward the floor, but do not allow it to touch the floor (you should hover about an inch or two over the floor). While you are lowering, pull the weights in toward your shoulders so that your elbow bends further toward your body (in case you have not noticed at this point, your arms are performing a biceps curl). Hover in the “down” position for 1 count and bring yourself back to the start position for 1 rep. Perform 15-25 reps on the same leg in a row for and then switch legs to complete the set. Perform 3 sets.

position A

position A

position B

position B

the push up

Everyone’s dreaded workout – but they really work! Push-ups are great for your shoulders, chest and arms, as well as your core. There are many variations of push-ups: extra wide (targets deltoids), narrow, keeping elbows in toward your torso (targets triceps), etc. However, the basic push-up is a great place to start, and an effective exercise to include in your routine. Begin by placing hands about shoulder width apart, palms facing down on the mat, elbows slightly bent (so as not to hyperextend). Use a mirror to check your position – no butts in the air and no slumping butts toward the floor! Your body should essentially form a straight line. Inhale as you slowly lower with control and return to start as you exhale. Been avoiding push-ups? No worries, start by performing 3 sets of 5. More advanced? Try to do 3 sets of 15-20. Increase the number of reps at your own pace. You will know you are doing the right amount when your form is correct throughout the entire set, but the last few seem very difficult to erk out.

postition A

postition A

position B

position B

the plank

My personal favorite! This exercise can be done in a variety of ways, so I have shown my two favorite basic planks below. For the yoga plank: begin in your standard push-up position, but instead, hold the position. Again, check your positioning! Wrist joints should be directly below shoulder joints and your body should essentially form a straight line from head to toe. A good length for a beginner is 30 seconds. As you progress, try to hold the plank for 1 minute or more. Advanced? Keep setting new goals by increasing the time or consider variations of planks, such as incorporating leg raises, holding out arms, etc. Similarly, the basic forearm plank can progress in the same way. For this version, forearms should be on the mat, with both hands in a fist, touching one another. Again, wrist joints should be directly beneath elbow joints.

basic yoga plank

basic yoga plank

basic forearm plank

basic forearm plank

the crunch

The basic crunch is often misused or not utilized at all, but truthfully, it really works well to engage your abs! The key is ensuring you maintain proper form, otherwise your neck ends up getting strained and doing most of the work, so your abs remain weak and your neck gets strained – ow! As you set up, lay down on the mat with legs bent and feet on the mat, so knees are pointed up toward the ceiling. Place hands behind your head but do not interlock your fingers. Slightly raise your head, neck and upper back off of the mat and continue gazing at the ceiling. To ensure proper positioning, imagine you are holding an orange between your chin and your chest (about the size of your fist). If you clench your chin to your chest, the orange will burst. However, if you let your head fall too far back, the orange will roll off. Your head should be in the perfect position to maintain the orange’s position if it were to be there. (Still not getting it? Grab an orange! You will feel the difference!) Engage your core as you lift your upper body further off of the mat (but maintain proper neck positioning) and exhale. Inhale as you return to start. try doing 30 slow crunches followed by 30 pulses (extra fast, like your pumping your body up to a beat). Or, try doing 30 crunches and on the 30th, holding the “up” position for 5-10 counts, then repeating a few times. Try to perform 3 sets.

position A

position A

position B

position B

These moves can be done in conjunction with other exercises or on their own for a great workout that targets the major muscle groups. Want to mix it up? Perform 3 sets of every exercise above, going through each one set at a time. Another great idea is to add some plyometrics (essentially, jumping, weight-bearing exercises) in between each set. This can be done by jumping on an aerobic step (with both feet at one time) and back to the floor for one minute. Always remember to stretch after each workout and fuel up with real food to give your muscles the fuel they need to recover and get stronger!

*Prior to beginning any fitness regimen, please consult your physician and make sure that you are fit to engage in such activity. If you feel unfit to perform this or any other recommended exercise, or feel faint, ill, injured or uneasy while performing an exercise, stop immediately and seek medical attention.